Tutorials
This section contains a few guides on how to create custom FactoryTX components.
Creating a custom transform
In FactoryTX, a Transform manipulates data extracted by a Receiver. FactoryTX offers a few built-in transform components. A list of them and their settings can be found in the Transforms section of the Configuration Reference. If none of the provided FactoryTX transforms fulfill your needs, you’ll have to create a custom one.
Let’s revisit our imaginary manufacturing startup and see how it’s doing. While mining in Mauritius for rare-earth metals to use in the head-up displays of our vehicles, we unearthed a large amount of amber. One of our top engineers, Dr. Wu, noticed that there were some mosquitoes preserved in the amber. He had a great idea of extracting the blood ingested by these mosquitoes and sequencing the DNA. Excited by the prospect of resurrecting a dodo, we decided to expand from automotive manufacturing and into bioengineering. We built a new facility devoted to genome sequencing and now want to link it up to FactoryTX, so we can do some data modeling and analysis in the Sight Machine platform.
The data created by the DNA sequencers in our bioengineering facility is stored in CSV files. For example:
timestamp |
counter |
accession number |
completion |
genus |
species |
|---|---|---|---|---|---|
2018-09-13 12:01:00 |
1 |
12345 |
88 |
Anopheles |
gambiae |
2018-09-13 12:11:00 |
2 |
23456 |
75 |
Stegosaurus |
stenops |
2018-09-13 12:21:00 |
3 |
34567 |
68 |
Ankylosaurus |
magniventris |
2018-09-13 12:31:00 |
4 |
45678 |
90 |
Raphus |
cucullatus |
2018-09-13 12:41:00 |
5 |
56789 |
100 |
Deinonychus |
antirrhopus |
2018-09-13 12:51:00 |
6 |
67890 |
99 |
Achillobator |
giganticus |
2018-09-13 13:01:00 |
7 |
98778 |
76 |
Brontosaurus |
excelsus |
2018-09-13 13:11:00 |
8 |
12346 |
84 |
Aedes |
aegypti |
2018-09-13 13:21:00 |
9 |
88888 |
89 |
Tyrannosaurus |
rex |
We want to be able to group entries with similar sequences based on their
locus name, which is a unique combination of an entry’s accession number and
the first letters of its genus and species. For example, the locus name for the
first entry should be: 12345AG. Since the data doesn’t have a locus name
column, we’ll need to create a transform that concatenates the accession number,
genus, and species, and saves the value as locus_name.
Setting up with the Developer Console
From the web UI, navigate to the Developer Console.

The Developer Console is a JupyterLab environment.
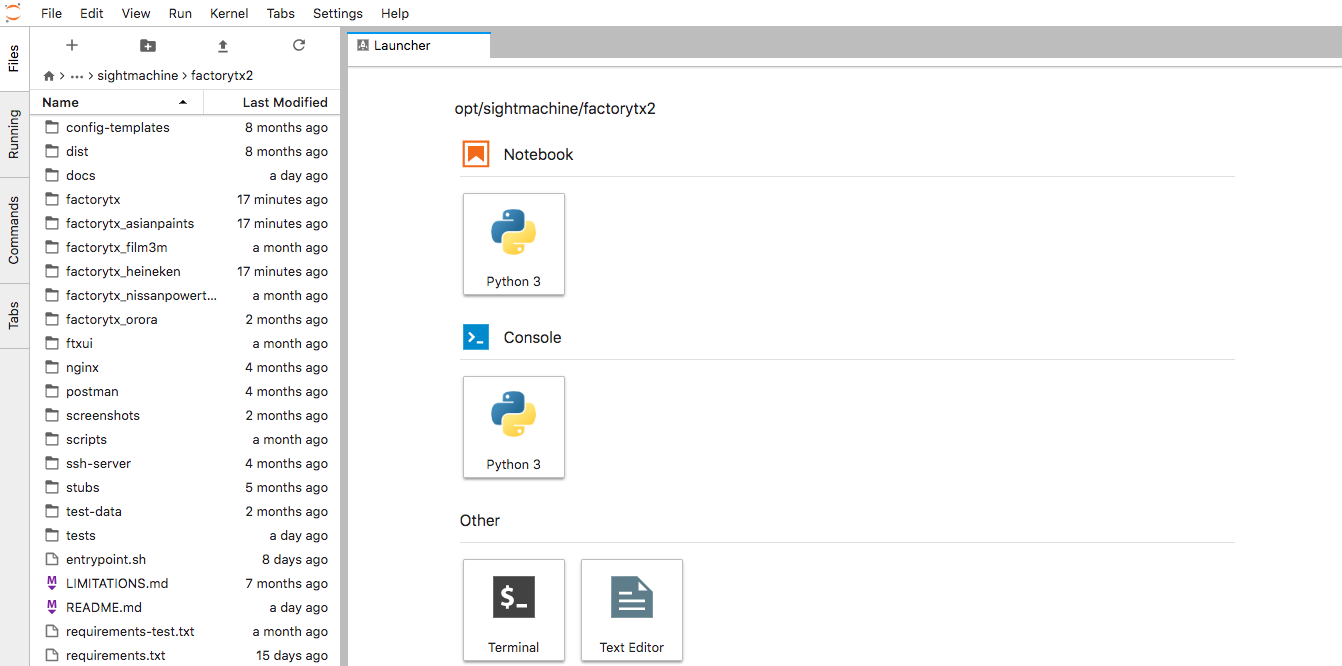
In the left sidebar, select the file browser and navigate to the /opt/sightmachine/factorytx2/ directory. This directory contains FactoryTX’s source code, and it’s where we will be saving our transform. Create a directory for our custom FactoryTX components (e.g. factorytx_tutorial).
From the Launcher menu, open a new Terminal window by clicking the +
button in the upper left corner and navigate to the FactoryTX directory.

# ls
LIMITATIONS.md    docs                   factorytx_heineken          nginx                  scripts           test-data
README.md         entrypoint.sh          factorytx_nissanpowertrain  postman                setup.py          tests
UPGRADING.md      factorytx              factorytx_orora             requirements-test.txt  ssh-server
config-templates  factorytx_asianpaints  factorytx_tutorial          requirements.txt       stubs
dist              factorytx_film3m       ftxui                       screenshots            supervisord.conf
# cd factorytx_tutorial
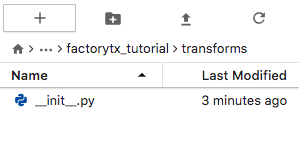
Inside of the FactoryTX directory, create a blank __init__.py file and a transforms folder (with a blank __init__.py file as well).
touch __init__.py && mkdir transforms && (cd transforms && touch __init__.py)
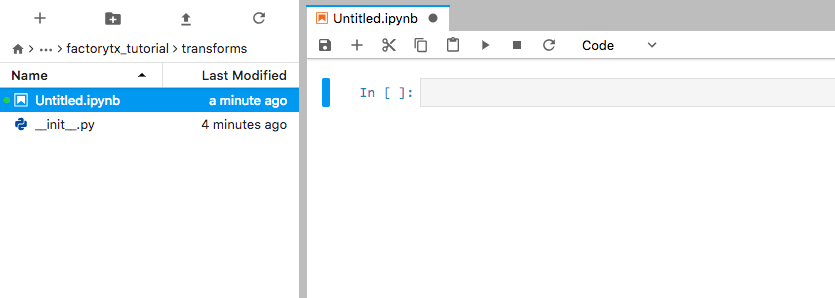
With the file browser, enter the transforms directory, open a new Launcher instance, and start a new Python 3 Notebook instance. This is where we will draft our custom transform.
Defining a Transform
Our custom transform should inherit from the base Transform class and define the following methods:
__init__(config, root_config): This method initializes the transform instance. It accepts two parameters:config: The configuration dictionary of the transform from the FactoryTX config. Thecleanmethod is used to validate and normalize this configuration, and the transform will only be initialized if there is no ValidationError.root_config: The root configuration dictionary, which can be used to access global settings (e.g. Sight Machine cloud credentials). This is the FactoryTX config.
clean(config, root_config): This method validates and normalizes a configuration dictionary. It validates that the configuration it receives is well-formed and will be accepted by the constructor. The method may also modify the configuration, such as inserting default values, and changes made to the config will persist in the configuration passed to the constructor. This method returns a list of ValidationMessage objects.process(record): This method implements the transformation logic that converts a record into a new record.
In the Python Notebook, import the base Transform class and other components that we’ll need (which we’ll go into more detail below), and create our custom transform.
from typing import List

import pandas as pd

from factorytx import markers
from factorytx.base import Transform, transforms
from factorytx.exceptions import Failure
from factorytx.validation import (
    ValidationError, ValidationMessage, clean_with_json_schema, has_errors
)


class ConcatTransform(Transform):
    @classmethod
    def clean(cls, config: dict, root_config: dict) -> List[ValidationMessage]:
        pass

    def __init__(self, config: dict, root_config: dict) -> None:
        pass

    def process(self, input_frame: pd.DataFrame) -> pd.DataFrame:
        pass
Processing a record
The process method of our ConcatTransform should contain the logic to
transform the record. When a Receiver gets data, the receiver converts
the data into a Pandas DataFrame
with labeled columns of asset data. We refer to the DataFrame as “record” and
it is sent through the transform components and ultimately packaged up and
transmitted by the transmit component.
For our transform, process will perform the concatenation that creates the
locus_name. We want to combine the accession number, the first letter
of the genus, and the first letter of the species in order. Let’s also
make sure that the letters are uppercase.
def process(self, input_frame: pd.DataFrame) -> pd.DataFrame:
    input_frame["locus_name"] = input_frame["accession number"].astype(str) \
                                + input_frame["genus"].str[0].str.upper() \
                                + input_frame["species"].str[0].str.upper()
When we transform a record (DataFrame), we should be making changes to a copy of the record and return it, so chained transformations do not produce unpredictable results.
def process(self, input_frame: pd.DataFrame) -> pd.DataFrame:
    df = input_frame.copy(deep=False)
    df["locus_name"] = df["accession number"].astype(str) \
                       + df["genus"].str[0].str.upper() \
                       + df["species"].str[0].str.upper()
    return df
Validating and cleaning configurations
Currently, our transform is hard-coded to concatenate a record’s
accession number, the first letter of genus, and the first letter of
species and save it as the locus_name. The transform is enough for
creating the locus name, but what happens if we want to concatenate different
values like use completion instead of accession number? We could create
a separate transform to perform that action; or we could make our current
transform configurable.
FactoryTX components use JSON Schema to describe
configurable settings and validate input. For our ConcatTransform, let’s
create a basic schema that describes the desired behavior: takes in 3 input
fields to concatenate and returns the output with a configurable title.
schema = {
    "properties": {
        "input_field1": {},
        "input_field2": {},
        "input_field3": {},
        "output_title": {}
    }
}
Since a component’s schema is also used for validating its configuration, we can use some of the built-in contraints that JSON Schema has available. For example, let’s make sure the types of the input received for the configuration match our expectations. Let’s also make sure that all the fields are specified in the configuration.
schema = {
    "type": "object",
    "properties": {
        "input_field1": {"type": "string"},
        "input_field2": {"type": "string"},
        "input_field3": {"type": "string"},
        "output_title": {"type": "string"}
    },
    "required": ["input_field1", "input_field2", "input_field3", "output_title"]
}
For reference on the available types, please refer to the Instance Data Model section of the JSON Schema documentation.
Our transform’s clean method can use this schema to check for
configuration issues as well as inject default values with the
clean_with_json_schema function.
def clean(cls, config: dict, root_config: dict) -> List[ValidationMessage]:
    validation_results = clean_with_json_schema(cls.schema, config)
    return validation_results
The clean method is also where we can add custom validation logic that JSON
schema constraints cannot handle. For instance, let’s make sure that the input
fields are unique and raise a ValidationError if there are any
duplicates.
def clean(cls, config: dict, root_config: dict) -> List[ValidationMessage]:
    validation_results = clean_with_json_schema(cls.schema, config)
    if has_errors(validation_results):
        return validation_results

    input1 = config['input_field1']
    input2 = config['input_field2']
    input3 = config['input_field3']
    input_fields = [input1, input2, input3]
    if len(set(input_fields)) != len(input_fields):
        if input1 in (input2, input3):
            error = ValidationError(('input_field1',), 'Duplicate input field')
            validation_results.append(error)
        if input2 in (input1, input3):
            error = ValidationError(('input_field2',), 'Duplicate input field')
            validation_results.append(error)
        if input3 in (input2, input3):
            error = ValidationError(('input_field3',), 'Duplicate input field')
            validation_results.append(error)

    return validation_results
The first parameter of a ValidationError is a JSON path to indicate which part of the configuration is incorrect. The Configuration Editor uses this information to highlight which line is incorrect. We also added a has_errors check to return early if any JSON schema constraints are violated.
Initializing the Transform
The __init__ method sets up the Transform instance based on the
configuration block in the FactoryTX config. We can use this opportunity to copy
the necessary fields that the transform needs.
def __init__(self, config: dict, root_config: dict) -> None:
    super().__init__(config, root_config)
    self.input_field1 = config['input_field1']
    self.input_field2 = config['input_field2']
    self.input_field3 = config['input_field3']
    self.output_title = config['output_title']
Since our transform now uses configurable settings, the process method will
need to be modified slightly to accommodate the change.
def process(self, input_frame: pd.DataFrame) -> pd.DataFrame:
    df = input_frame.copy(deep=False)
    df[self.output_title] = df[self.input_field1].astype(str) \
                            + df[self.input_field2].astype(str).str[0].str.upper() \
                            + df[self.input_field3].astype(str).str[0].str.upper()
    return df
Surfacing transform issues
To report issues encountered while transforming the record, we should use the factorytx.markers module. Marked warnings and errors will be logged, displayed in the Streams UI for increased visibility, and persist between FactoryTX restarts. For example, if an input field does not exist in the record, we should raise an error.
def process(self, input_frame: pd.DataFrame) -> pd.DataFrame:
    df = input_frame.copy(deep=False)

    if self.input_field1 not in df.columns:
        markers.error('transforms.data', f"Unable to concatenate: input field, {self.input_field1}, does not exist in the record")
        raise Failure

    if self.input_field2 not in df.columns:
        markers.error('transforms.data', f"Unable to concatenate: input field, {self.input_field2}, does not exist in the record")
        raise Failure

    if self.input_field3 not in df.columns:
        markers.error('transforms.data', f"Unable to concatenate: input field, {self.input_field3}, does not exist in the record")
        raise Failure

    markers.clear('transforms.data')
    df[self.output_title] = df[self.input_field1].astype(str) \
                            + df[self.input_field2].astype(str).str[0].str.upper() \
                            + df[self.input_field3].astype(str).str[0].str.upper()
    return df
We clear the markers (markers.clear) when the input field checks pass, so if we fixed an incorrect configuration, the outdated markers do not persist.
Registering and using the Transform
Before we can use our ConcatTransform, we’ll need to register it as a
transform that FactoryTX can use. Whenever FactoryTX is started, it’ll activate
all of the components in its Registry, so they are readily available. Our
transform file should now look like this:
from typing import List

import pandas as pd

from factorytx import markers
from factorytx.base import Transform, transforms
from factorytx.exceptions import Failure
from factorytx.validation import (
    ValidationError, ValidationMessage, clean_with_json_schema, has_errors
)

@transforms.register('locus_name_concat')
class ConcatTransform(Transform):

    schema = {
        "type": "object",
        "properties": {
            "input_field1": {"type": "string"},
            "input_field2": {"type": "string"},
            "input_field3": {"type": "string"},
            "output_title": {"type": "string"}
        },
        "required": ["input_field1", "input_field2", "input_field3", "output_title"]
    }

    @classmethod
    def clean(cls, config: dict, root_config: dict) -> List[ValidationMessage]:
        validation_results = clean_with_json_schema(cls.schema, config)
        if has_errors(validation_results):
            return validation_results

        input1 = config['input_field1']
        input2 = config['input_field2']
        input3 = config['input_field3']
        input_fields = [input1, input2, input3]
        if len(set(input_fields)) != len(input_fields):
            if input1 in (input2, input3):
                error = ValidationError(('input_field1',), 'Duplicate input field')
                validation_results.append(error)
            if input2 in (input1, input3):
                error = ValidationError(('input_field2',), 'Duplicate input field')
                validation_results.append(error)
            if input3 in (input2, input3):
                error = ValidationError(('input_field3',), 'Duplicate input field')
                validation_results.append(error)

        return validation_results

    def __init__(self, config: dict, root_config: dict) -> None:
        super().__init__(config, root_config)
        self.input_field1 = config['input_field1']
        self.input_field2 = config['input_field2']
        self.input_field3 = config['input_field3']
        self.output_title = config['output_title']

    def process(self, input_frame: pd.DataFrame) -> pd.DataFrame:
        df = input_frame.copy(deep=False)

        if self.input_field1 not in df.columns:
            markers.error('transforms.data', f"Unable to concatenate: input field, {self.input_field1}, does not exist in the record")
            raise Failure

        if self.input_field2 not in df.columns:
            markers.error('transforms.data', f"Unable to concatenate: input field, {self.input_field2}, does not exist in the record")
            raise Failure

        if self.input_field3 not in df.columns:
            markers.error('transforms.data', f"Unable to concatenate: input field, {self.input_field3}, does not exist in the record")
            raise Failure

        markers.clear('transforms.data')
        df[self.output_title] = df[self.input_field1].astype(str) \
                                + df[self.input_field2].astype(str).str[0].str.upper() \
                                + df[self.input_field3].astype(str).str[0].str.upper()
        return df
Before enabling our transform to process real data, let’s check that it works as expected with simulated data in the Python Notebook. Run the selected cell with our custom transform. In the second cell, we’ll use some functions that FactoryTX uses in unit tests:
csv_string_to_dataframe: changes a comma-delimited multiline string into a DataFrame
load_transform: loads a FactoryTX transform based on the provided configuration
Our quick test should look something like this:
from factorytx.test_utils import (csv_string_to_dataframe, load_transform)

CONFIG = {
    'transform_type': "locus_name_concat",
    'transform_name': "Locus Namer",
    'filter_stream': ['*'],
    "input_field1": "accession number",
    "input_field2": "genus",
    "input_field3": "species",
    "output_field": "locus_name"
}

INPUT_DATA = """\
timestamp,counter,accession number,completion,genus,species
2018-09-13 12:01:00,1,12345,88,Anopheles,gambiae
2018-09-13 12:11:00,2,23456,75,Stegosaurus,stenops
2018-09-13 12:21:00,3,34567,68,Ankylosaurus,magniventris
2018-09-13 12:31:00,4,45678,90,Raphus,cucullatus
2018-09-13 12:41:00,5,56789,100,Deinonychus,antirrhopus
2018-09-13 12:51:00,6,67890,99,Achillobator,giganticus
2018-09-13 13:01:00,7,98778,76,Brontosaurus,excelsus
2018-09-13 13:11:00,8,12346,84,Aedes,aegypti
2018-09-13 13:21:00,9,88888,89,Tyrannosaurus,rex
"""

input_df = csv_string_to_dataframe(INPUT_DATA)
transform = load_transform(CONFIG)
transformed_df = transform.process(input_df)
transformed_df
Run the selected cell and the output should print the transformed DataFrame.
             timestamp  counter  accession number  completion          genus       species locus_name
0  2018-09-13 12:01:00        1             12345          88      Anopheles       gambiae    12345AG
1  2018-09-13 12:11:00        2             23456          75    Stegosaurus       stenops    23456SS
2  2018-09-13 12:21:00        3             34567          68   Ankylosaurus  magniventris    34567AM
3  2018-09-13 12:31:00        4             45678          90         Raphus    cucullatus    45678RC
4  2018-09-13 12:41:00        5             56789         100    Deinonychus   antirrhopus    56789DA
5  2018-09-13 12:51:00        6             67890          99   Achillobator    giganticus    67890AG
6  2018-09-13 13:01:00        7             98778          76   Brontosaurus      excelsus    98778BE
7  2018-09-13 13:11:00        8             12346          84          Aedes       aegypti    12346AA
8  2018-09-13 13:21:00        9             88888          89  Tyrannosaurus           rex    88888TR
Delete the cell with the test code, and convert the Python Notebook into a Python file that FactoryTX can use. You can copy the code and save it to a new .py file or run the conversion command in the Terminal.
jupyter nbconvert --to=python locus_name_concat.ipynb
Now restart FactoryTX with the FactoryTX Controller. Once FactoryTX has been restarted, we can use our custom transform by setting it in our FactoryTX configuration file.
Snapshot testing the Transform
We should write a unit test for our custom transform before sharing it, so any changes that break the expected behavior will be flagged. FactoryTX has the capability to perform gold master (or snapshot) testing. A snapshot test is similar to what we did for the quick test in the Python Notebook. We’ll take CSV data and process it with the specified transform. A snapshot test takes a further step by comparing the output with the result from a previous test run.
To add a snapshot test to FactoryTX unit tests, create a Python directory named
after the FactoryTX tenant (e.g. factorytx_tutorial) in the tests
directory. Then, create a transforms Python directory and create the Python
unit test file (e.g. test_snapshot_locus_name_concat.py). We’ll import
helper functions from the factorytx.snapshot_test_utils module and
factorytx.test_utils module. The contents of your test file should look
something like this:
from factorytx.snapshot_test_utils import compare_with_snapshot
from factorytx.test_utils import (csv_string_to_dataframe, load_transform)

CONFIG = {
    'transform_type': "locus_name_concat",
    'transform_name': "Locus Namer",
    'filter_stream': ['*'],
    "input_field1": "accession number",
    "input_field2": "genus",
    "input_field3": "species",
    "output_field": "locus_name"
}

INPUT_DATA = """\
timestamp,counter,accession number,completion,genus,species
2018-09-13 12:01:00,1,12345,88,Anopheles,gambiae
2018-09-13 12:11:00,2,23456,75,Stegosaurus,stenops
2018-09-13 12:21:00,3,34567,68,Ankylosaurus,magniventris
2018-09-13 12:31:00,4,45678,90,Raphus,cucullatus
2018-09-13 12:41:00,5,56789,100,Deinonychus,antirrhopus
2018-09-13 12:51:00,6,67890,99,Achillobator,giganticus
2018-09-13 13:01:00,7,98778,76,Brontosaurus,excelsus
2018-09-13 13:11:00,8,12346,84,Aedes,aegypti
2018-09-13 13:21:00,9,88888,89,Tyrannosaurus,rex
"""

def test_cookie_type_concat_transform(capsys, snapshot):
    input_df = csv_string_to_dataframe(INPUT_DATA)
    transform = load_transform(CONFIG)
    transformed_df = transform.process(input_df)

    with capsys.disabled():
        compare_with_snapshot(transformed_df, snapshot, [])
Anatomy of a snapshot test:
CONFIG: a dictionary-type variable that has key-value pairs necessary for configuring the transform. The configuration is based on the transform’s schema.INPUT_DATA: CSV data that will be processed by the transform. The data can come in the form of a multiline Python string or a CSV file saved in a directory. It is suggested to only save data as a CSV file if the transform needs to process a large amount of data. For an example of a snapshot test using a CSV file, please refer to the snapshot test for the Rename transform.The test function should pass in
capsysandsnapshotas parameters.snapshotfor reading and writing snapshot datacapsysneeds to be disabled so differences between the current output and snapshot are formatted correctly in the Terminal
csv_string_to_dataframe: Converts the CSV string buffer into a Pandas DataFrame for the transform to process.
load_transform: Loads the FactoryTX transform based on the provided configuration.
compare_with_snapshot: Compares the output from the transform processing the data with the saved snapshot.
To run snapshot tests, please use Pytest:
# If you are running within the Docker container or Developer Console (recommended):
cd /opt/sightmachine/factorytx2

# If you are running from the factorytx-core directory:
cd /opt/sightmachine/factorytx-core

# If you are running from the factorytx-<customer> directory:
# Remember to replace "<customer>" with the customer name
cd /opt/sightmachine/factorytx-<customer>

pytest tests/factorytx/transforms/test_snapshot_locus_name_concat.py

# To update a snapshot, add `--snapshot-update` to the command
pytest tests/factorytx/transforms/test_snapshot_locus_name_concat.py --snapshot-update
NOTE: When a test is run for the first time, the snapshot will be
automatically created. Snapshots will be saved in the
tests/.../transforms/snapshots directory.
Creating a custom file receiver
In FactoryTX, a FileReceiver fetches files from a Connection and parses the files with any configured Parser. FactoryTX has a few built-in file receivers:
If none of the available file receivers meet your needs, you’ll need to create your own.
Defining a Connection
A Connection connects to a data source (e.g. local system, SMB) and can list available files, fetch files, and optionally delete files.
Your custom connection should inherit from the base Connection class and define the following methods:
__init__(config, root_config): This method initializes the connection instance. It accepts two parameters:config: The configuration dictionary of the connection from the FactoryTX config. Thecleanmethod is used to validate and normalize this configuration, and the connection will only be initialized if there is no ValidationError.root_config: The root configuration dictionary, which can be used to access global settings (e.g. Sight Machine cloud credentials). This is the FactoryTX config.
clean(config, root_config): This method validates and normalizes a configuration dictionary. It validates that the configuration it receives is well-formed and will be accepted by the constructor. The method may also modify the configuration, such as inserting default values, and changes made to the config will persist in the configuration passed to the constructor. This method returns a list of ValidationMessage objects.close(): Closes the connection and frees up any associated resources (e.g. sockets).copy(file_entry, local_path): Copies a file’s contents from a remote server to a specified temporary file on the local disk. It accepts two parameters:file_entry: metadata about the file, such as the path to the file on the remote server.local_path: path to write the file to. It will always point to an existing zero-byte file.
delete(file_entry): Deletes a file from the remote server. Connection classes that do not support deletion may raise aNotImplementedErrorinstead. Thefile_entryparameter is metadata about the file, such as the path to the file on the remote server.list(): Lists the files (FileEntry) on the remote server.
As mentioned in the Creating a custom transform tutorial, you’ll need to
include a schema that can be applied to your connection. This schema
defines what properties can be configured for your connection and is what should
be used in the clean method for validation.
When a Connection object is initialized, its connection will be
established until the close method is called to disconnect it. Since
FactoryTX initializes all Receiver instances at runtime and polls for new
data on an interval, there isn’t a need to track the status of a connection
separately from the state of FactoryTX. If FactoryTX is active, the connection
should be active as well.
Catching Connection errors
If any errors or exceptions are encountered while using the connection, a
ConnectionError should be thrown. For example, to catch and surface an
error when deleting a file, our delete method would look something like this:
def delete(self, file_entry: FileEntry) -> None:
    try:
        del file_entry.path
    except Exception as e:
        raise ConnectionError("Unable to delete the file!")
Using the Connection
Your custom connection helps connect to a data source, but it doesn’t retrieve any files. You’ll have to associate it with a FileReceiver, which polls the connection and collects new files for FactoryTX to process.
Create a subclass of the base FileReceiver and assign the
connection_class attribute to your custom connection.
class MyFirstFileReceiver(FileReceiver):
    connection_class = MyCustomConnection
In effect, you’ve created a new Receiver. To use your data receiver, you’ll need to add it to FactoryTX’s Registry.
@receivers.register('my_first_file_receiver')
class MyFirstFileReceiver(FileReceiver):
    connection_class = MyCustomConnection
    ...
Please refer to the LocalFileReceiver for an example of a custom file receiver.
Creating a custom receiver
In FactoryTX, a Receiver collects the data from a source and passes it to the data pipeline for Transform and Transmit components to process. FactoryTX has a few built-in receivers, and a list of available receivers and their configuration options can be found in the data_receiver section of the Configuration Reference. If none of the available data receivers meet your needs, you’ll need to create a custom one.
Defining a Receiver
Your custom data receiver should inherit from the base Receiver class and define the following methods:
__init__(dataflow, config, root_config): This method initializes the receiver instance. It accepts three parameters:dataflow: The object to store the retrieved data. Callingdataflow.process(df)will route the DataFrame “df” to all applicable transforms and transmits.config: The configuration dictionary of the receiver from the FactoryTX config. Thecleanmethod is used to validate and normalize this configuration, and the transform will only be initialized if there is no ValidationError.root_config: The root configuration dictionary, which can be used to access global settings (e.g. Sight Machine cloud credentials). This is the FactoryTX config.
clean(config, root_config): This method validates and normalizes a configuration dictionary. It validates that the configuration it receives is well-formed and will be accepted by the constructor. The method may also modify the configuration, such as inserting default values, and changes made to the config will persist in the configuration passed to the constructor. This method returns a list of ValidationMessage objects.purge(streams): Removes all receiver state associated with specified streams. It takes in a list of InputStreamId to purge.test_connection(): Attempts to connect to the data source and returns a ConnectionTestResult object to report the result of the test.run(): Performs the work of extracting data from the data source.
And the following attributes:
CONNECTION_INFO: A dict containing information for the FE to use when rendering
this receiver as an option in the connection UI (display name, description, etc.)
CONNECTION_FORM_INPUTS: A tuple of dicts that specify the inputs used in the form UI in the connection UI.
As mentioned in the Creating a custom transform tutorial, you’ll need to
include a schema that can be applied to your receiver. This schema defines what
properties can be configured for your receiver and is what should be used in
the clean method for validation.
It is important to note that when a Receiver object is initialized,
FactoryTX runs it in a separate process. The run method should not return,
but it doesn’t necessarily have to be an infinite loop. The method could call
another method or function that keeps the process alive.
Passing records to the data pipeline
When the receiver collects data from a source, the data is converted into a record. A record is a Pandas DataFrame with labeled columns of asset data. Records from the receiver should be passed to the DataflowGraph object, which serves as a wrapper for a collection of Transform and Transmit components. When the DataflowGraph processes a record, the record is routed through transform(s) and uploaded to the Sight Machine cloud by the transmit.
Loading and storing state
A receiver is stateful. It keeps track of data that has already been processed and transmitted per input stream, so it can differentiate between new and old data. For example, the FileReceiver stores the size and last modified time of each file processed in the data pipeline. If any of the files are modified, the receiver will re-parse the file and send the new data to the data pipeline.
The __init__ method of your custom receiver should initialize the connection
to the StateStore. While your receiver is running, it should load and
update the StateStore with information about the processed and
transmitted data.
The purge method of your custom receiver should completely clear its
StateStore. A restream uses this method, so data that was previously
processed will be processed and transmitted again.
Handling transient problems
Sometimes a receiver will encounter temporary issues getting data like connectivity problems to a remote database. You can use the factorytx.markers module to surface a warning or error message to the Streams UI.
When the problem arises, your custom receiver should create a marker with markers.warning or markers.error based on the issue’s severity. Markers are stored in a SQLite database, so if FactoryTX is stopped and/or restarted, the markers will persist. When the receiver successfully collects data again, it should clear the warning/error marker with markers.clear.
Spawning receiver threads
A receiver process can spawn threads. We strongly recommend using the factorytx.supervisor module to create and manage threads. The Supervisor class will automatically log errors and restart threads that have unexpectedly terminated. Threads that crash frequently will wait longer to be restarted, preventing system overload.
Adding support for the connection UI
Each receiver stores information about the connection UI in the two attributes
mentioned above: CONNECTION_INFO and CONNECTION_FORM_INPUTS. In addition
the test_connection method is called when the user clicks on the “Test Connection”
button in the UI.
Below is an example of a CONNECTION_INFO:
For the image to be displayed in the frontend, it needs to be added to the fe-react codebase–otherwise it will fall back to a default image. The name and protocol should both match the name used to register the receiver. The description should be concise. The link should lead to a reliable source of accurate information on the data source.
Below is an example of CONNECTION_FORM_INPUTS:
We support the following type``s: text, datetime-local, integer, float, password, select, radio, object, checkbox.
For the most part, the frontend converts all types into an html ``input element with the type attribute set
appropriately. Exceptions include the select type, which is converted into a select element, and the object
type, which contains a list of nested inputs, and should only be used when you need to produce a nested configuration
object.
In addition, the input config provides the following options:
name: The key that will be used to store the value of the input in the connection object.
display_name: The label of the input in the connection UI.
tooltip: A helpful tooltip shown next to the input, explaining its purpose.
default: A default value of the input.
required: Is the field required? Connection test will fail if any required fields are left blank.
ignore_if_empty: An optional field to ignore this field from the config output if the input is ‘’
value_if: An optional field available for select inputs that sets the value of other inputs
when the select input changes. For example, the select input below allows the user to choose an
SMB connection type. When the user chooses a connection type, the value of the port input will
change automatically based on the connection type selected (445 if “direct_hosted”, 139 if “netbios”):
show_if: An optional field that can be used to hide an input under specific conditions. For example,
the input below, “netbios_name”, is only shown if the input with name “connection_type” has value
“netbios”.
Creating an integration test
To test that your custom receiver works as expected, create an integration test. An integration test is different from a unit test, which is the type used for testing transform components. An integration test creates and runs an instance of FactoryTX that collects data, and processes and transmits records to a local instance of the Sight Machine platform.
Create a new Python file for your test in the integration-tests/test-runner directory (e.g. test_custom_receiver1.py). In your test file, you’ll want to import some helper methods from integration-tests/test-runner/ftx_test_utils.py.
- clear_sslogs()
Removes all sslogs (records) from the tenant’s database.
- fetch_all_sslogs(sleep_seconds)
Waits until the sslog count stops changing then returns all sslogs.
- get_rdpv2_credentials()
Returns RDPv2 credentials for the running ma instance as a (id, key) tuple.
- get_tenant()
Returns the name of the tenant being used for the test suite.
- setup_config_file(config)
Creates a configuration file in a temporary directory for the FactoryTX instance to use and returns its path.
- setup_data_dir()
Creates a temporary data directory that FactoryTX can use and returns its path.
- spawn_ftx_container(config_dir, data_dir)
Spawns an instance of FactoryTX based on the provided configuration and data directory.
You’ll also want to import some helper functions from the factorytx.snapshot_test_utils module if you want to compare the observed records with a snapshot.
Create a FactoryTX configuration that uses your custom receiver,
including any necessary parsers and transforms. The data_transmit section
should be directed to the local instance of the Sight Machine platform, using
the get_tenant and get_rdpv2_credentials helper functions.
rdpv2_api_id, rdpv2_api_key = get_rdpv2_credentials()
tenant = get_tenant()
config = {
    "data_receiver": [...],
    "transforms": [...],
    "data_transmit": [
        {
            "transmit_name": "My RDP Transmit",
            "transmit_type": "remotedatapost",
            "base_url": f"http://{tenant}.ma",
            "API_key_ID": rdpv2_api_id,
            "API_key": rdpv2_api_key,
            "filter_stream": ["*"],
            "poll_interval": 1
        }
    ]
}
Your test function should look something like this:
def test_my_custom_receiver(snapshot):
    # Clears the records database, so only records generated in the test
    # are used for comparison
    clear_sslogs()

    # Creates a FactoryTX configuration file in a temporary directory
    ftx_config_dir = setup_config_file(config)

    # Sets up a data directory for FactoryTX to use
    data_dir = setup_data_dir()

    # Spawn the FactoryTX instance
    ftx_container = spawn_ftx_container(ftx_config_dir, data_dir)

    # On an interval, check the number of records in the Sight Machine
    # platform database. When the count of records stops changing, all the
    # records will be returned.
    sslogs = fetch_all_sslogs(sleep_seconds=10)

    # Stop the FactoryTX instance
    ftx_container.stop()

    # Sort the results so the comparison does not need to worry
    # about the order of records
    sslogs = sorted(sslogs, key=lambda s: (s['data']['source'], s['data']['timestamp']))

    # Convert the records into a Pandas DataFrame for comparison
    df = convert_sslogs_to_dataframe(sslogs)

    # Compare the observed results with a snapshot (gold master)
    compare_with_snapshot(df, snapshot, index=['data.source', 'data.timestamp'])
To run the test, please follow the instructions in the README file of the integration-tests directory.
Creating a custom parser
In FactoryTX, a FileReceiver uses a Parser to convert file contents into structured data for the transform and transmit components to process. FactoryTX has a few built-in parsers, and a list of available parsers and their configuration options can be found in the Parsers Configurations section. If none of the available parsers fulfill your needs, you’ll need to create your own.
Defining a Parser
Your custom parser should inherit from the base Parser class and define the following methods:
__init__(config, root_config): This method initializes the parser instance. It accepts two parameters:config: The configuration dictionary of the parser from the FactoryTX config. Thecleanmethod is used to validate and normalize this configuration, and the connection will only be initialized if there is no ValidationError.root_config: The root configuration dictionary, which can be used to access global settings (e.g. Sight Machine cloud credentials). This is the FactoryTX config.
clean(config, root_config): This method validates and normalizes a configuration dictionary. It validates that the configuration it receives is well-formed and will be accepted by the constructor. The method may also modify the configuration, such as inserting default values, and changes made to the config will persist in the configuration passed to the constructor. This method returns a list of ValidationMessage objects.process(file_entry, state, local_path): Processes a file and converts it into a Pandas DataFrame. It accepts three parameters:file_entry: metadata about the file, eg. its name, path on the remote server, last modification time, etc.state: None if the file has not been previously processed, or the state dictionary returned the last time this file was processed.local_path: path to a temporary file containing the file contents on the local disk. This file will be removed once file has been parsed.
It returns a tuple of a DataFrame containing the data extracted from the file, and a JSON-seriallizable state dictionary.
As mentioned in the Creating a custom transform tutorial, you’ll need to
include a schema that can be applied to your parser. This schema defines what
properties can be configured for your parser and is what should be used in
the clean method for validation.
Stateful processing
When a receiver passes a file to the parser, the receiver includes the current
state of the file (or None if the file hasn’t been parsed). The state is a
JSON-serializable dictionary that includes file metadata such as the last
time the file was processed. When the parser has finished converting the file,
it passes back the file’s new state to the receiver for storage in its
StateStore.
Stateful processing can be used to implement incremental parsing, which is especially handy for files that are gradually added to. For example, the Excel Parser tracks and refers to a file’s row count. If new rows have been added, the parser will only process the new data and pass it along the data pipeline.