Creating a FactoryTX VM
FactoryTX VM images are created with the Balena platform, which helps build, deploy, and manage code running on remote devices.
Set up a Balena Application
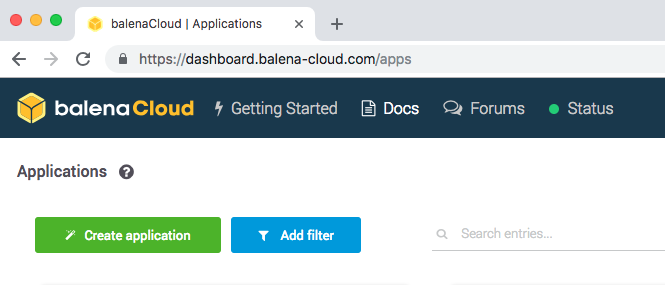
With a web browser, navigate to the Balena dashboard and create a new application by selecting the Create application button.
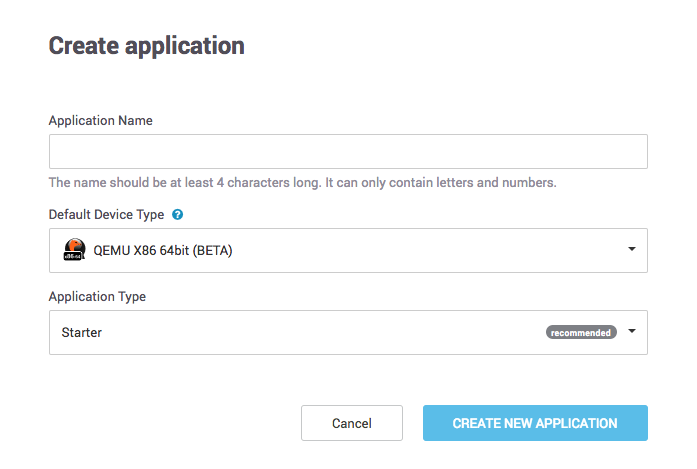
The Application Name should be the name of the customer that will be using the VM (e.g. ESXiSanFran) and the Default Device Type should be QEMU X86 64bit.
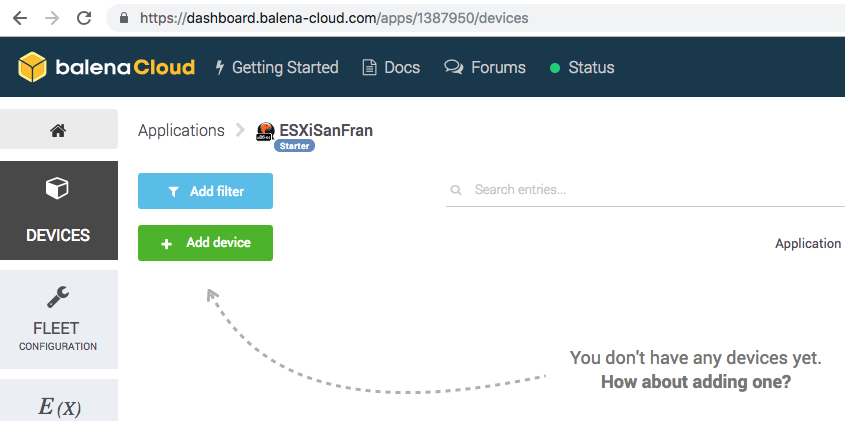
After creating the application, select the Add device button.
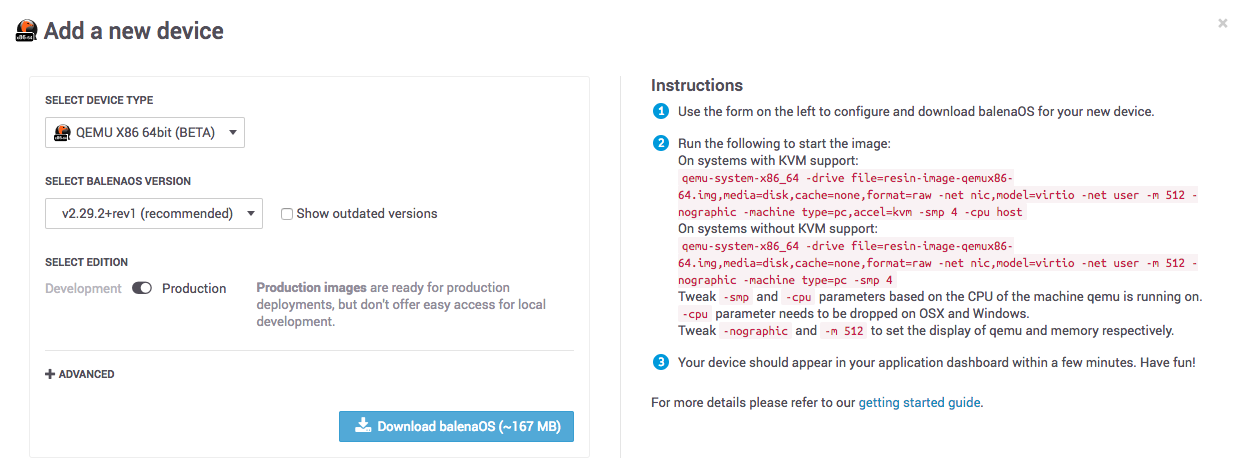
To add a device to a Balena application, we’ll need to download a BalenaOS image to run on the remote device. Please select the QEMU X86 64bit device type, the latest BalenaOS version, and the Production edition.
Create FactoryTX OS and Data Disks
After downloading the zipped BalenaOS image, we’ll need to modify it so that the operating system runs on one virtual machine disk and FactoryTX data is stored on a separate virtual machine disk.
In order to accomplish this task, please have the following tools installed:
QEMU: Used for converting an IMG file into VMDK
VirtualBox: Used for virtualizing a Linux virtual machine to mount and configure the OS and data disks
Convert Raw BalenaOS IMG
With qemu-img, convert the raw BalenaOS IMG file to a VMDK file.
qemu-img convert -f raw balena-cloud-ESXi-1-qemux86-64-2.29.2+rev1-v9.0.1.img -O vmdk factorytx-os.vmdk
Create the FactoryTX data disk
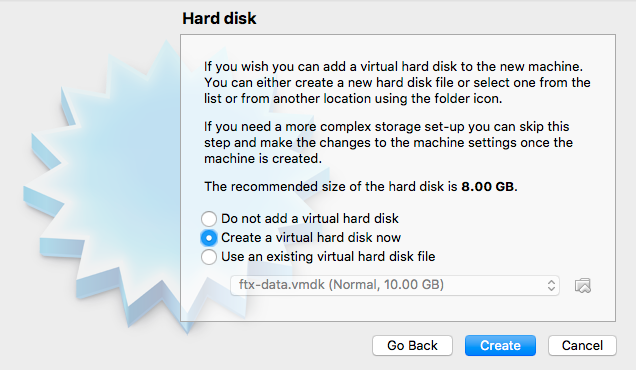
To create the FactoryTX data disk, we’ll use VirtualBox to create a new virtual machine, factorytx-data, with a 10.00 GB hard disk.
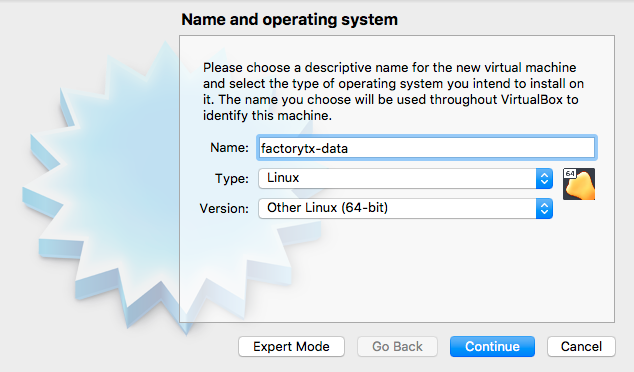
We want to create a new virtual hard disk.
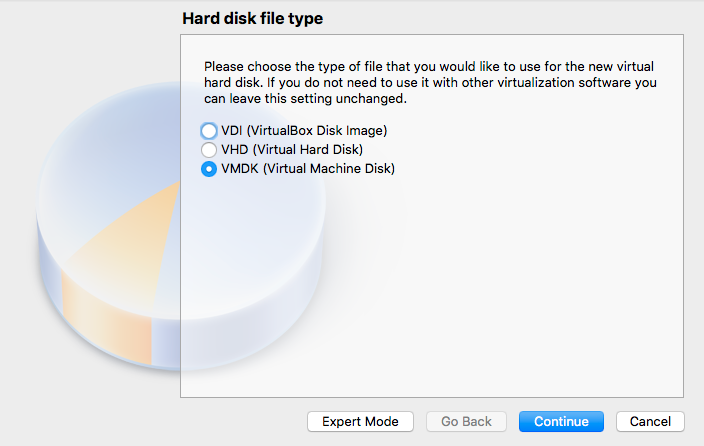
For the type of hard disk file, we specify VMDK for ESXi servers.
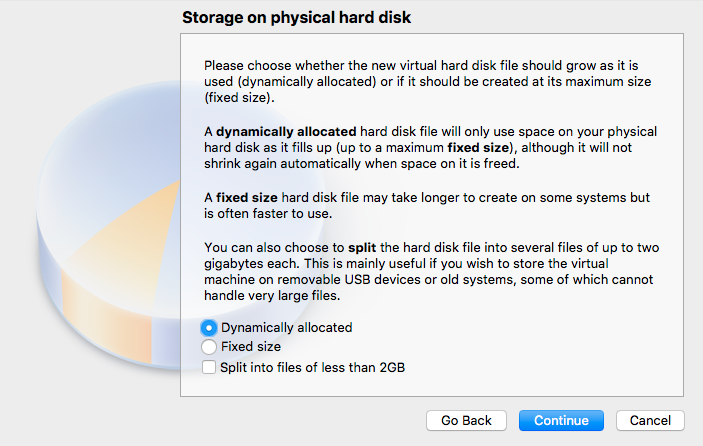
Use dynamically allocated for the hard disk file, instead of fixed size, for a slimmer initial size.
Modify BalenaOS and FactoryTX data disk files
Using a Linux virtual machine (e.g. Ubuntu 64-bit), add the BalenaOS and FactoryTX VMDK files as additional storage disks, and start up the VM.
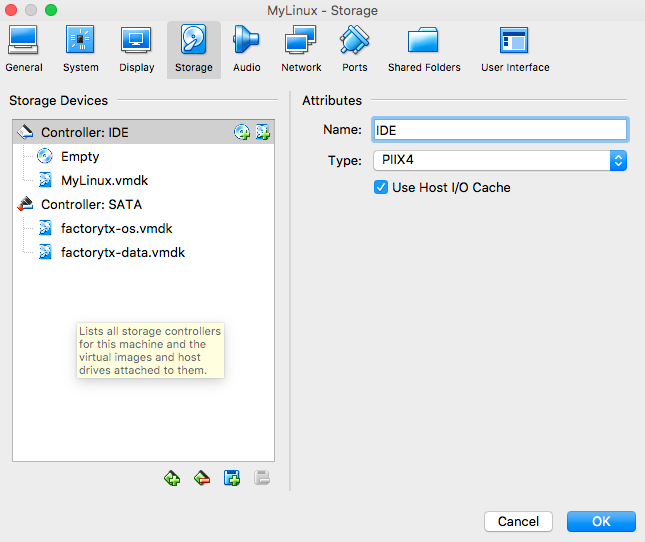
Example settings for Ubuntu VM:

Open a Terminal window and run fdisk -l (sudo may need to be prepended)
to see the disk partitions available.
uc@uc-VirtualBox:~$ sudo fdisk -l

...

Disk /dev/sdb: 1.7 GiB, 1807745024 bytes, 3530752 sectors
Units: sectors of 1 * 512 = 512 bytes
Sector size (logical/physical): 512 bytes / 512 bytes
I/O size (minimum/optimal): 512 bytes / 512 bytes
Disklabel type: dos
Disk identifier: 0x00000000

Device     Boot   Start     End Sectors  Size Id Type
/dev/sdb1  *       8192   90111   81920   40M  e W95 FAT16 (LBA)
/dev/sdb2         90112  729087  638976  312M 83 Linux
/dev/sdb3        729088 1368063  638976  312M 83 Linux
/dev/sdb4       1368064 3530751 2162688    1G  f W95 Ext'd (LBA)
/dev/sdb5       1376256 1417215   40960   20M 83 Linux
/dev/sdb6       1425408 3530751 2105344    1G 83 Linux

Disk /dev/sdc: 10 GiB, 10737418240 bytes, 20971520 sectors
Units: sectors of 1 * 512 = 512 bytes
Sector size (logical/physical): 512 bytes / 512 bytes
I/O size (minimum/optimal): 512 bytes / 512 bytes
In this example, the /dev/sdb disk correlates to the BalenaOS disk
(factorytx-os.vmdk), and the /dev/sdc disk correlates to the FactoryTX
data disk (factorytx-data.vmdk).
Before we can use the FactoryTX data disk, we’ll need to partition it with fdisk and format it with mkfs.
uc@uc-VirtualBox:~$ sudo fdisk /dev/sdc

Welcome to fdisk (util-linux 2.31.1).
...

Command (m for help): p
Disk /dev/sdc: 10 GiB, 10737418240 bytes, 20971520 sectors
Units: sectors of 1 * 512 = 512 bytes
Sector size (logical/physical): 512 bytes / 512 bytes
I/O size (minimum/optimal): 512 bytes / 512 bytes
Disklabel type: dos
Disk identifier: 0xfcfcedea

Command (m for help): n
Partition type
   p   primary (0 primary, 0 extended, 4 free)
   e   extended (container for logical partitions)
Select (default p): p
Partition number (1-4, default 1): 1
First sector (2048-20971519, default 2048):
Last sector, +sectors or +size{K,M,G,T,P} (2048-20971519, default 20971519):

Created a new partition 1 of type 'Linux' and of size 10 GiB.

Command (m for help): w
The partition table has been altered.
Calling ioctl() to re-read partition table.
Syncing disks.
uc@uc-VirtualBox:~$ sudo mkfs.ext4 /dev/sdc

mke2fs 1.44.1 (24-Mar-2018)
Found a dos partition table in /dev/sdc
Proceed anyway? (y,N) y
Creating filesystem with 2621440 4k blocks and 655360 inodes
Filesystem UUID: b14b8d40-9bc4-470d-9076-8f64357eb563
Superblock backups stored on blocks:
    32768, 98304, 163840, 229376, 294912, 819200, 884736, 1605632

Allocating group tables: done
Writing inode tables: done
Creating journal (16384 blocks): done
Writing superblocks and filesystem accounting information: done
To configure BalenaOS (and the FactoryTX process) to use the FactoryTX data
disk, we use e2label to change
the label for the data disk to resin-data and rename the resin-data
partition of the BalenaOS disk to something else (e.g. old-resin-data).
uc@uc-VirtualBox:~$ sudo e2label /dev/sdc resin-data
uc@uc-VirtualBox:~$ sudo e2label /dev/sdb6 old-resin-data
Shut down the VM and remove its references to the OS and data disks. The VMDK files are now ready to be tested and/or deployed to and run in a hypervisor:
Note on VMX Files
A VMX file is not automatically generated through the process above. A VMX file is the primary configuration file of a virtual machine, detailing virtual hardware settings and power management options. It should be automatically created when you create a new virtual machine and updated when setting changes are made. For reference, this is what a VMX file looks like for a FactoryTX VM configured in our ESXi test lab.
 1.encoding = "UTF-8"
 2config.version = "8"
 3virtualHW.version = "14"
 4nvram = "factorytx.nvram"
 5pciBridge0.present = "TRUE"
 6svga.present = "TRUE"
 7pciBridge4.present = "TRUE"
 8pciBridge4.virtualDev = "pcieRootPort"
 9pciBridge4.functions = "8"
10pciBridge5.present = "TRUE"
11pciBridge5.virtualDev = "pcieRootPort"
12pciBridge5.functions = "8"
13pciBridge6.present = "TRUE"
14pciBridge6.virtualDev = "pcieRootPort"
15pciBridge6.functions = "8"
16pciBridge7.present = "TRUE"
17pciBridge7.virtualDev = "pcieRootPort"
18pciBridge7.functions = "8"
19vmci0.present = "TRUE"
20hpet0.present = "TRUE"
21floppy0.present = "FALSE"
22RemoteDisplay.maxConnections = "-1"
23memSize = "2048"
24bios.bootRetry.delay = "10"
25powerType.powerOff = "default"
26powerType.suspend = "soft"
27powerType.reset = "default"
28tools.upgrade.policy = "manual"
29sched.cpu.units = "mhz"
30sched.cpu.affinity = "all"
31sched.cpu.latencySensitivity = "normal"
32vm.createDate = "1549929931983582"
33scsi0.virtualDev = "lsilogic"
34scsi0.present = "TRUE"
35usb.present = "TRUE"
36ehci.present = "TRUE"
37ide1:0.fileName = "/vmfs/volumes/5c5e02ae-dd56a996-7779-44a8424a7ffe/factorytx-os.vmdk"
38sched.ide1:0.shares = "normal"
39sched.ide1:0.throughputCap = "off"
40ide1:0.present = "TRUE"
41ide1:1.fileName = "/vmfs/volumes/5c5e02ae-dd56a996-7779-44a8424a7ffe/factorytx-data.vmdk"
42sched.ide1:1.shares = "normal"
43sched.ide1:1.throughputCap = "off"
44ide1:1.present = "TRUE"
45ethernet0.virtualDev = "e1000"
46ethernet0.networkName = "VM Network"
47ethernet0.addressType = "generated"
48ethernet0.wakeOnPcktRcv = "FALSE"
49ethernet0.present = "TRUE"
50ide0:0.deviceType = "atapi-cdrom"
51ide0:0.fileName = "/vmfs/devices/cdrom/mpx.vmhba2:C0:T5:L0"
52ide0:0.present = "TRUE"
53displayName = "factorytx"
54guestOS = "otherlinux-64"
55toolScripts.afterPowerOn = "TRUE"
56toolScripts.afterResume = "TRUE"
57toolScripts.beforeSuspend = "TRUE"
58toolScripts.beforePowerOff = "TRUE"
59tools.syncTime = "FALSE"
60uuid.bios = "56 4d 64 b7 4e be 3b 56-64 aa 0e 5d e6 2c 78 3c"
61uuid.location = "56 4d 64 b7 4e be 3b 56-64 aa 0e 5d e6 2c 78 3c"
62vc.uuid = "52 53 b8 9e 9f e7 1f fd-85 97 54 47 1a 1e 39 cd"
63sched.cpu.min = "0"
64sched.cpu.shares = "normal"
65sched.mem.min = "0"
66sched.mem.minSize = "0"
67sched.mem.shares = "normal"